Hailstorms don’t just dent metal they dent claim payouts when documentation falls short. If you’re searching how to document hail damage for an insurance claim, you’re already ahead of most homeowners. That matters. Because the difference between a fully paid claim and a frustrating underpayment often comes down to one thing: evidence. I’ve seen it repeatedly. Two homes. Same storm. Same neighborhood. Completely different outcomes. Why? One homeowner took the time to document everything clearly. The other relied on a quick inspection and a handful of blurry photos. Guess who got the better settlement?
This guide walks you through exactly how to document hail damage for an insurance claim step by step, with practical actions you can take today. Whether you’re preparing to file or just doing your research before hiring help, this is your playbook. And if you’re dealing with storm damage in Mckinney, this process becomes even more critical due to how frequently hail events impact the area. Let’s get into it.
Why Documentation Makes or Breaks Your Hail Damage Claim
Insurance companies don’t pay based on assumptions. They pay based on proof.
Strong documentation:
- Shows the full extent of damage
- Connects damage to a specific storm
- Reduces back-and-forth with adjusters
- Speeds up claim processing
- Strengthens your negotiating position
Weak documentation:
- Leaves gaps in the story
- Causes missed line items
- Leads to partial approvals or denials
- Creates confusion during inspections
- Reduces perceived severity of damage
Here’s the reality: your claim is only as strong as the documentation behind it.
What Insurance Companies Look for in Hail Damage Evidence
Before you grab your phone and start snapping photos, you need to understand what actually matters.
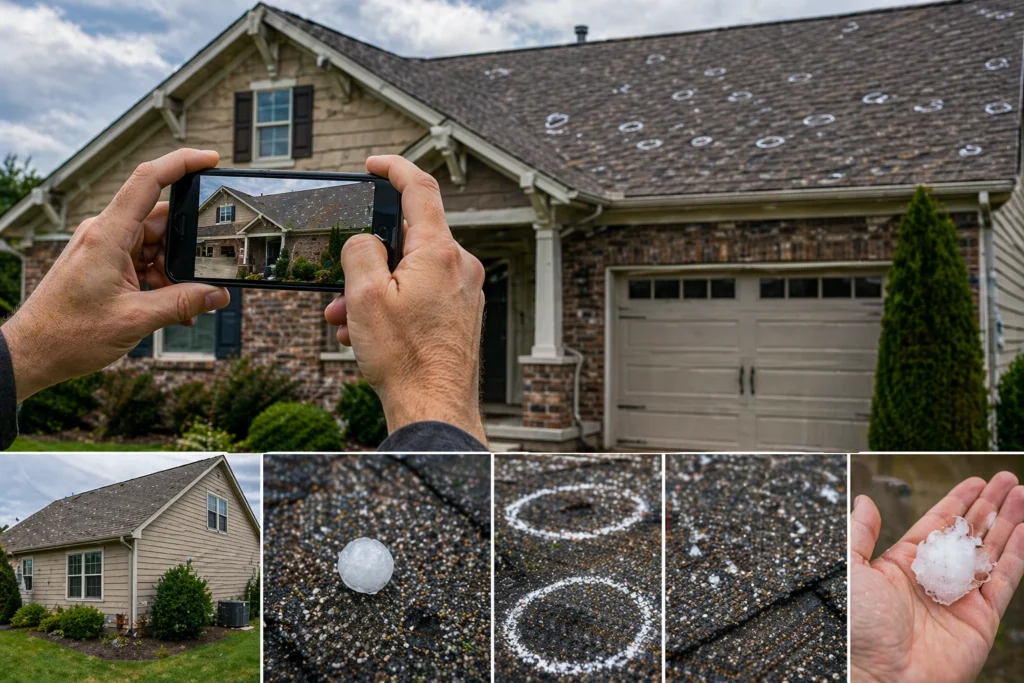
Photo and Video Proof Requirements
Insurers want clarity. Not guesswork.
You need:
- Wide shots of each side of your home
- Close-ups of damage points
- Angled shots showing depth and impact
- Consistent lighting
- Multiple perspectives of the same damage
Blurry or distant photos? They get ignored. Clean visuals win.
Date and Time Verification
Timing matters more than most people realize.
You should:
- Keep original timestamps on photos
- Capture storm reports from your area
- Document when damage was first noticed
This connects your damage directly to a specific weather event critical for approval.
Material-Specific Damage Identification
| Material Type | What to Look For | Why It Matters |
| Asphalt Shingles | Granule loss, bruising | Indicates impact damage |
| Metal Roofing | Dents, coating damage | Clear visual proof |
| Tile Roofing | Cracks, fractures | Risk of leaks |
| Soft Metals | Dented gutters, flashing | Confirms hail size |
Each material tells a story. Your job is to capture it clearly.
Step-by-Step: How to Document Hail Damage for an Insurance Claim
Step 1 – Start with Ground-Level Documentation
Walk your property first.
Look for:
- Gutter dents
- Siding marks
- AC unit damage
- Window screen tears
Photograph everything. Wide shots and close-ups.
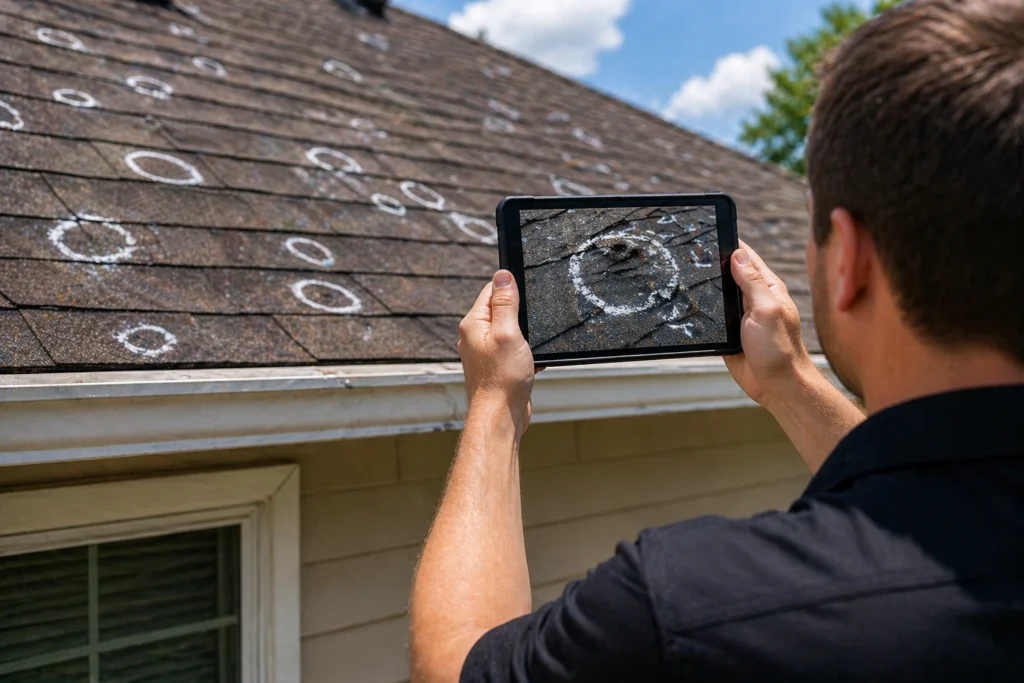
Step 2 – Safely Inspect the Roof
If safe to do so:
- Wear proper footwear
- Avoid steep or wet surfaces
Capture:
- Random hail impact patterns
- Shingle bruising
- Granule displacement
Use chalk to highlight impacts for better visibility in photos.
Step 3 – Capture Interior Damage
Don’t skip this.
Look for:
- Ceiling stains
- Moisture spots
- Attic dampness
Interior damage strengthens your claim significantly.
Step 4 – Document Supporting Structures
Include:
- Fences
- Garage doors
- Outdoor equipment
- Decks
Hail rarely damages just one surface.
Step 5 – Organize and Label Your Evidence
This step separates strong claims from weak ones.
Best practices:
- Create folders by category
- Label photos clearly
- Keep chronological order
Organization = credibility.
Tools That Make Documentation Easier
- Smartphone (high-res camera)
- Drone (for safer inspections)
- Moisture meter
- Flashlight
Professionals use advanced tools but even basic tools can produce strong results when used correctly.
Common Documentation Mistakes That Cost You Money
Avoid these:
- Too few photos
- Missing roof angles
- Ignoring small damage
- No scale reference
- Delayed documentation
Small mistakes lead to big losses.
How Weather Data Strengthens Your Claim
Photos show damage. Weather proves cause.
Use:
- Hail reports
- Radar tracking
- Local storm records
When both align, your claim becomes stronger.
Creating a Strong Documentation Package
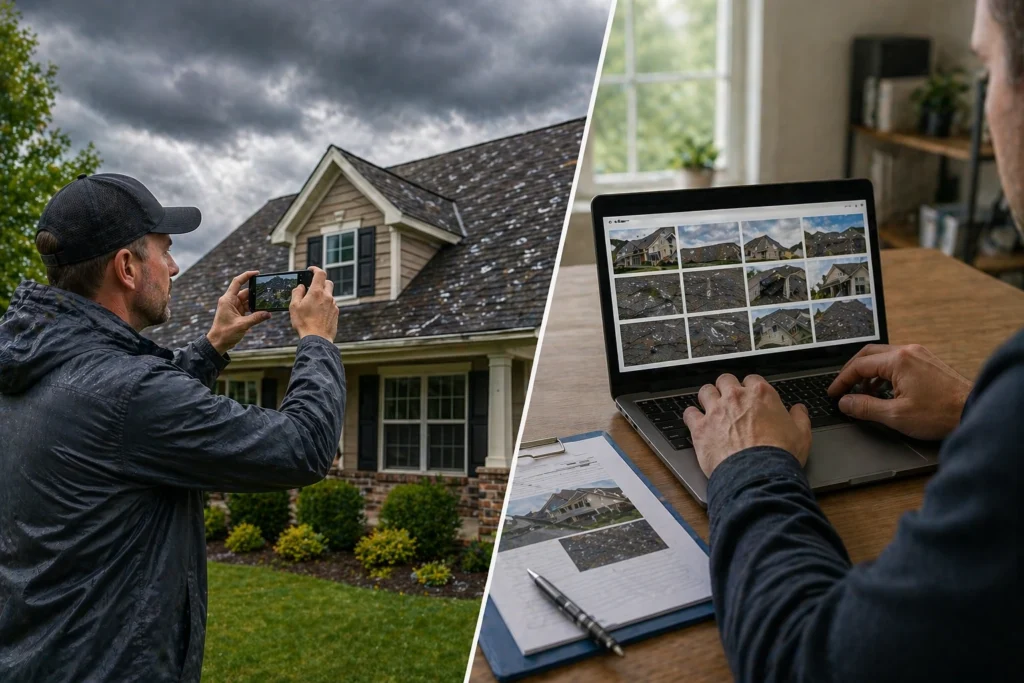
What to Include
- Photos and videos
- Written summary
- Weather data
- Inspection notes
How to Present It
- Group by location
- Add short descriptions
- Keep it structured
Make it easy to review.
What Happens After Submission
Insurance will:
- Review your documentation
- Conduct inspection
- Compare findings
Outcomes:
- Full approval
- Partial payout
- Denial
Your documentation drives the result.
When DIY Documentation Isn’t Enough
DIY works until it doesn’t.
Challenges arise when:
- Damage is subtle
- Large areas are affected
- Items are missed
That’s where professional help matters.
How Public Adjusters Improve Outcomes
Public adjusters:
- Document thoroughly
- Use estimating systems
- Identify missed damage
- Negotiate with insurers
In places like Mckinney, where hailstorms can be severe, this can significantly impact final payouts.
Pro Tips to Maximize Your Claim
- Document immediately
- Keep all receipts
- Avoid early repairs
- Track communications
Simple steps. Big impact.
Case Example: Documentation Matters
| Scenario | Weak Claim | Strong Claim |
| Photos | Minimal | Detailed |
| Coverage | Partial | Full |
| Outcome | $9,000 | $19,500 |
Same storm. Different result.
Final Checklist
- Photograph all areas
- Include interior + exterior
- Use timestamps
- Add weather data
- Organize files
- Review before submitting
Advanced Insight
Precision matters. Documentation strategy often mirrors analytical approaches like the Monte Carlo method where multiple variables influence outcomes. Miss one variable, and your result changes.
Strategic Perspective
Think like an adjuster.
Ask:
- Is damage clear?
- Is cause obvious?
- Is scope complete?
If yes, your claim is strong.
Timing Strategy
Best approach:
- Document immediately
- Submit when complete
Too early = incomplete
Too late = delayed
Balance wins.
Conclusion
Understanding how to document hail damage for an insurance claim gives you control. It turns uncertainty into structure. It transforms your claim into a clear, evidence-backed case. And when you’re dealing with a Hail Damage Roof Insurance Claim, that level of precision can directly impact how much you recover. In competitive areas like Mckinney, details matter more than ever. Document everything. Stay organized. Be thorough. Because in insurance claims the details pay.
FAQs
Take as many as needed to cover every surface roof, exterior, and interior from multiple angles.
Yes, a modern smartphone with a high-resolution camera is more than sufficient for clear documentation.
Clear, well-labeled photos combined with weather data proving the storm event.
Yes, documenting as soon as it’s safe helps preserve accurate evidence and timestamps.
Not necessarily ground photos and drones can help, but roof-level documentation is stronger if done safely.
Yes, incomplete or unclear evidence can result in underpayment or denial.
Document it as soon as possible and support your claim with weather reports and inspection notes.
Absolutely small damage can indicate larger underlying issues and should always be included.
Yes, as long as the footage is clear, relevant, and supports visible damage.
Consider hiring one if your claim is complex, denied, or significantly underpaid.